Self-Host Models With vLLM
vLLm is the best way to run LLMs locally by offering a memory efficient framework, while basing the model repository on the industry standard HuggingFace. This guide explains how to set up vLLM, download Mistral Small, and inference directly on your server.
vLLM is an excellent solution for AI developers who are running large language models on a server in a fast and memory-efficient manner. Unlike Ollama, which is designed for individuals wanting to self-host a model on a Mac Mini, vLLM is ideal for those looking to host AI models for their team or for customers in a distributed setting. One of the main limitations of Ollama is that it can only support 1 to 4 connections simultaneously, whereas I have successfully managed to support over 180 connections on the same hardware with the same model using vLLM.
This capability can help generate AI datasets or for those security-minded users who want GitHub assistance with code completions in their integrated development environment (IDE) without sending data to Microsoft. This is made possible by vLLM's built-in API web server, which allows you to use OpenAI's API documentation and SDKs in your applications, making it nearly interoperable with previously developed programs.
In this article, I will explore how to set up a local vLLM instance, download Mistral Small, and run inferences with it on your local machine.
Install vLLM

Since vLLM’s installation process varies depending on your hardware, visit the vLLM docs and follow the installation commands provided for your system.
Once installed, you can verify the installation by running:
vllm -hThis should display the available options:
usage: vllm [-h] [-v] {serve,complete,chat} ...

vLLM CLI

positional arguments:
  {serve,complete,chat}
    serve               Start the vLLM OpenAI Compatible API server
    complete            Generate text completions based on the given prompt via the running API server
    chat                Generate chat completions via the running API server

options:
  -h, --help            show this help message and exit
  -v, --version         show program's version number and exit
Download MistralSmall
To download a model, you'll need to get the HuggingFace CLI installed on your machine by running:
pip install -U "huggingface_hub[cli]"Once installed, sign in with HuggingFace, since you'll need approval to download MistralSmall.
huggingface-cli loginTo download MistralSmall, visit the HuggingFace repository and request access to the model.
Once access has been granted, you can download MistralSmall from the hub:
huggingface-cli download mistralai/Mistral-Small-24B-Instruct-2501 --local-dir mistralSmallStart vLLM inference server
To start the OpenAI-compatible server, use the following command. Be sure to set CUDA_VISIBLE_DEVICES to specify which GPUs vLLM should use. Your tensor-parallel-size and pipeline-parallel-size should be set based on the number of GPUs available (e.g., for 4 GPUs: tp=2, pp=2).
root@blogger1:/home/blogger1# CUDA_VISIBLE_DEVICES=0,1,2,3 vllm serve mistralSmall/ --dtype auto --api-key token-abc123 -tp 2 --pipeline-parallel-size 2 --gpu-memory-utilization 1 --max-model-len 4000 --served-model-name mistral-small-24b-instruct-2501 --enable-auto-tool-choice --tool-call-parser mistralOnce the model loads, you should see a list of available API routes:
INFO 02-01 16:47:18 launcher.py:19] Available routes are:
INFO 02-01 16:47:18 launcher.py:27] Route: /openapi.json, Methods: HEAD, GET
INFO 02-01 16:47:18 launcher.py:27] Route: /docs, Methods: HEAD, GET
INFO 02-01 16:47:18 launcher.py:27] Route: /docs/oauth2-redirect, Methods: HEAD, GET
INFO 02-01 16:47:18 launcher.py:27] Route: /redoc, Methods: HEAD, GET
INFO 02-01 16:47:18 launcher.py:27] Route: /health, Methods: GET
INFO 02-01 16:47:18 launcher.py:27] Route: /tokenize, Methods: POST
INFO 02-01 16:47:18 launcher.py:27] Route: /detokenize, Methods: POST
INFO 02-01 16:47:18 launcher.py:27] Route: /v1/models, Methods: GET
INFO 02-01 16:47:18 launcher.py:27] Route: /version, Methods: GET
INFO 02-01 16:47:18 launcher.py:27] Route: /v1/chat/completions, Methods: POST
INFO 02-01 16:47:18 launcher.py:27] Route: /v1/completions, Methods: POST
INFO 02-01 16:47:18 launcher.py:27] Route: /v1/embeddings, Methods: POST
INFO 02-01 16:47:18 launcher.py:27] Route: /pooling, Methods: POST
INFO 02-01 16:47:18 launcher.py:27] Route: /score, Methods: POST
INFO 02-01 16:47:18 launcher.py:27] Route: /v1/score, Methods: POST
Using the API
Text-to-text models are extremely useful beyond just chatting. Sometimes, you want to use them for content filtering; other times, you want to build your own chat UI, or maybe you want to connect it to your IDE. These are valid use cases, which vLLM supports with their API to connect with your specific use cases and applications. To begin using your local API, you'll want to know your machine's IP address, which you can find by running:
ip addrOnce you have your IP address, we'll need to unblock the port 8000 on Ubuntu, you can do this with ufw:
ufw allow 8000Once you have opened the port 8000, you can connect to the vLLM API at http://<your-ip>:8000/v1. Here is an example request to your vLLM API, which lists the models we're serving:
root@blogger1:/home/blogger1# curl http://20.22.22.206:8000/v1/models \
  -H "Authorization: Bearer token-abc123"

{
   "object":"list",
   "data":[
      {
         "id":"mistral-small-24b-instruct-2501",
         "object":"model",
         "created":1738451058,
         "owned_by":"vllm",
         "root":"mistral12b/",
         "parent":null,
         "max_model_len":4000,
         "permission":[
            {
               "id":"modelperm-ff063274d9274ac7b501fb31ea86ea78",
               "object":"model_permission",
               "created":1738451058,
               "allow_create_engine":false,
               "allow_sampling":true,
               "allow_logprobs":true,
               "allow_search_indices":false,
               "allow_view":true,
               "allow_fine_tuning":false,
               "organization":"*",
               "group":null,
               "is_blocking":false
            }
         ]
      }
   ]
}
vLLM's API also has OpenAPI-compatible spec with a hosted docs endpoint. To view them, In your browser, visit: http://<your-ip>:8000/docs. You'll be met with the following API docs:
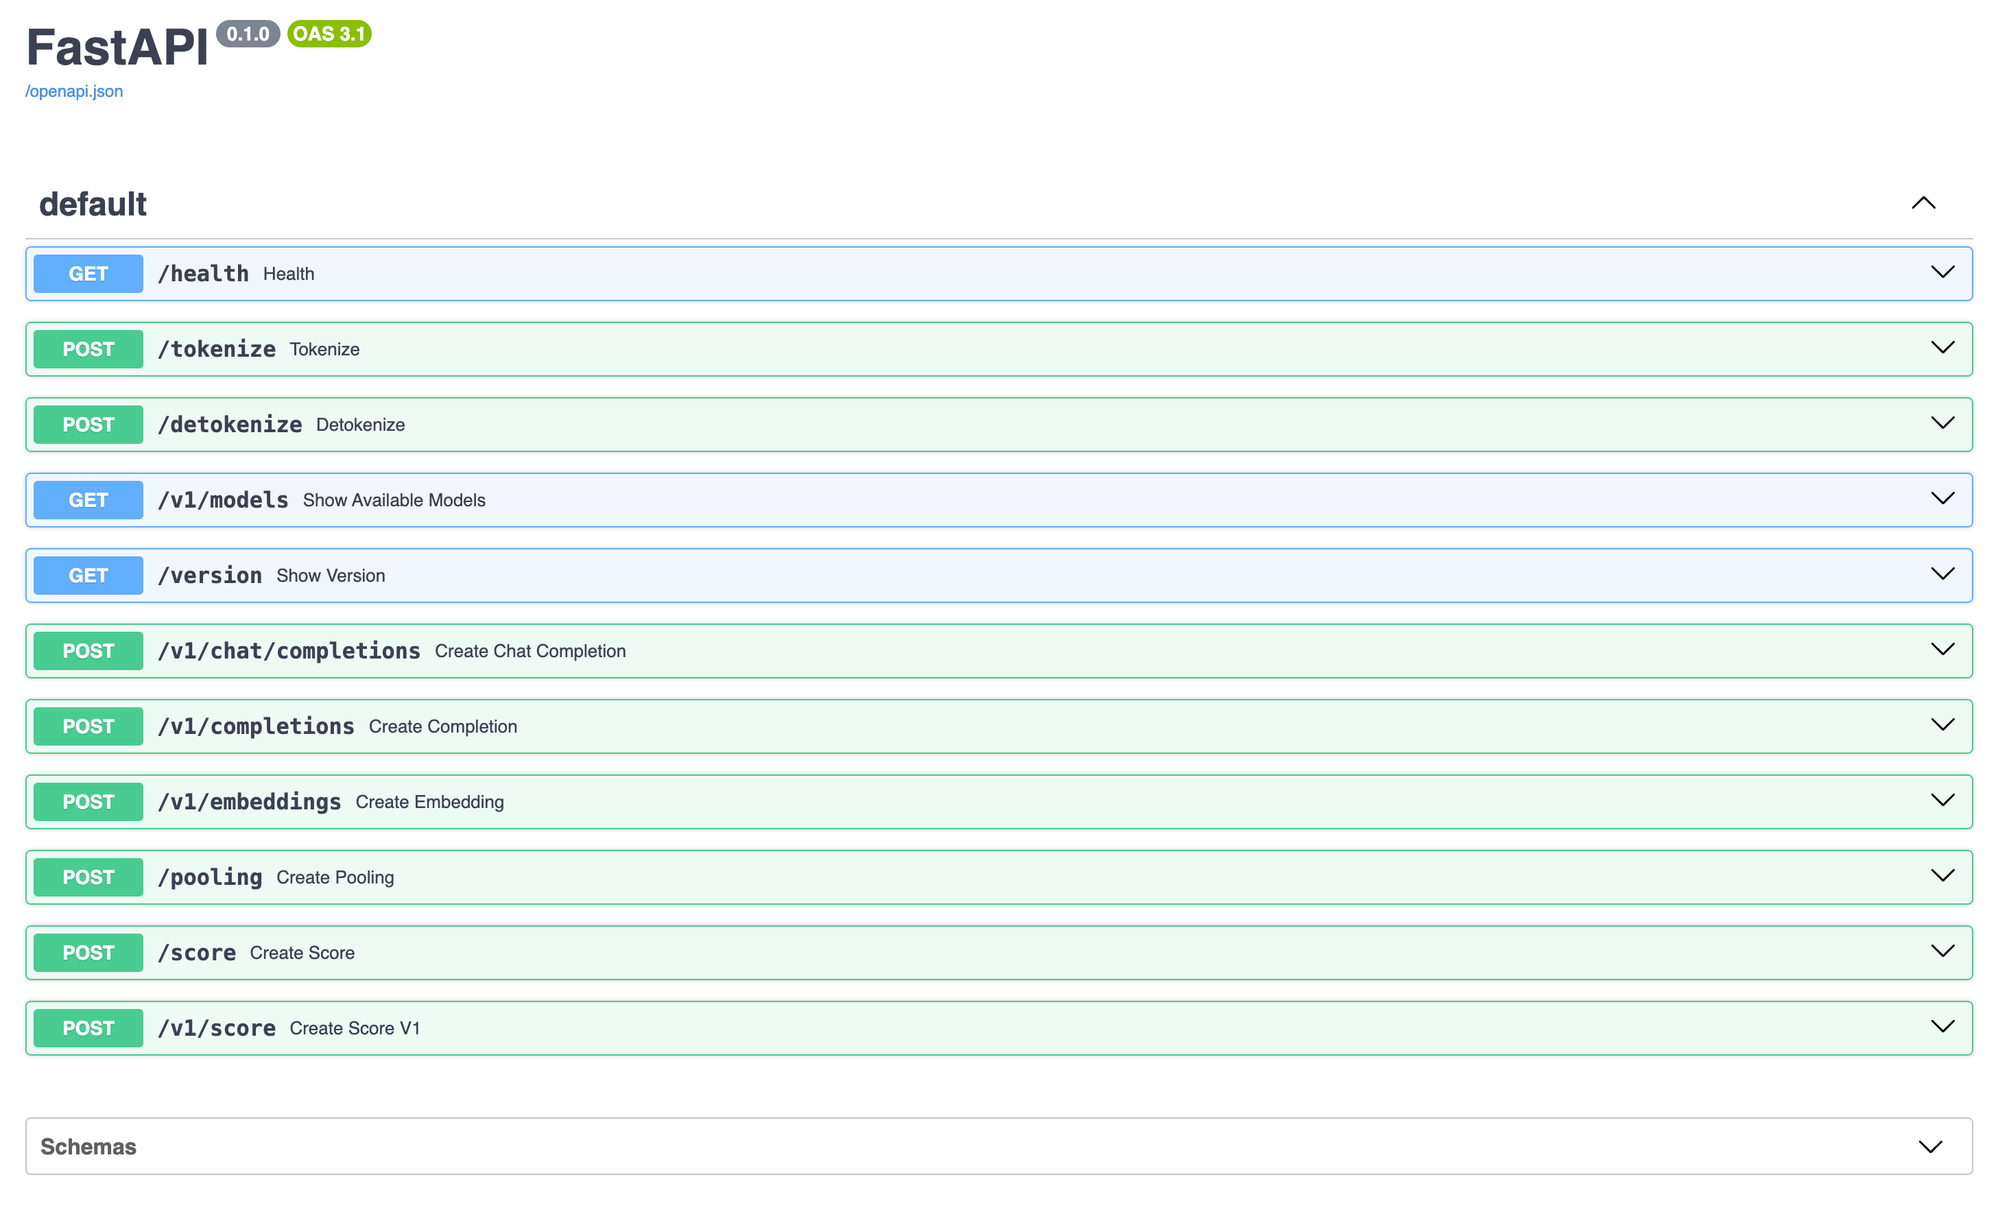
As you can see, the API server is directly compatible with OpenAI's API. This means that we can seal this command from OpenAI's documentation and receive an output:
OpenAI Command:
curl https://api.openai.com/v1/chat/completions \
  -H "Content-Type: application/json" \
  -H "Authorization: Bearer $OPENAI_API_KEY" \
  -d '{
    "model": "gpt-4o",
    "messages": [
      {
        "role": "system",
        "content": "You are a helpful assistant."
      },
      {
        "role": "user",
        "content": "Hello!"
      }
    ]
  }'
vLLM Command:
curl http://<your-ip>:8000/v1/chat/completions \
  -H "Content-Type: application/json" \
  -H "Authorization: Bearer token-abc123" \
  -d '{
    "model": "mistral-small-24b-instruct-2501",
    "messages": [
      {
        "role": "system",
        "content": "You are a helpful assistant."
      },
      {
        "role": "user",
        "content": "Hello!"
      }
    ]
  }'
vLLM Response:
{
   "id":"chatcmpl-17f8e2130a6b49f4b675913e18855a49",
   "object":"chat.completion",
   "created":1738451114,
   "model":"mistral-small-24b-instruct-2501",
   "choices":[
      {
         "index":0,
         "message":{
            "role":"assistant",
            "content":"Hello! How can I assist you today?",
            "tool_calls":[

            ]
         },
         "logprobs":null,
         "finish_reason":"stop",
         "stop_reason":null
      }
   ],
   "usage":{
      "prompt_tokens":11,
      "total_tokens":21,
      "completion_tokens":10,
      "prompt_tokens_details":null
   },
   "prompt_logprobs":null
}
Using OpenAI's SDK
Since vLLM is compatible with OpenAI's API, you can use OpenAI's Python and JavaScript SDK. You might use this if you want the model to perform more like an agent executing code through tool calls. While tool calling and loops are ideally implemented in production code with LangGraph, vLLM performs effectively for simple tasks using the model's provided system tokens.
from openai import OpenAI

client = OpenAI(
    base_url="http://<your-ip>:8000/v1",
    api_key="token-abc123"
)

tools = [{
    "type": "function",
    "function": {
        "name": "get_weather",
        "description": "Gets the current weather for a given city.",
        "parameters": {
            "type": "object",
            "properties": {
                "location": {
                    "type": "string",
                    "description": "The name of the city"
                }
            },
            "required": [
                "location"
            ],
            "additionalProperties": False
        },
        "strict": True
    }
}]

completion = client.chat.completions.create(
    model="mistral-small-24b-instruct-2501",
    messages=[{"role": "user", "content": "What is the weather in Strasbourg, France?"}],
    tools=tools
)

print(completion.choices[0].message.tool_calls)
This will return the following response:
[ChatCompletionMessageToolCall(id='0UAqFzWsD', function=Function(arguments='{"location": "Strasbourg"}', name='get_weather'), type='function')]Integrate with Visual Studio Code
With a Visual Studio Code extension twinny, you can use local AI models like GitHub CoPilot to auto-complete your code.
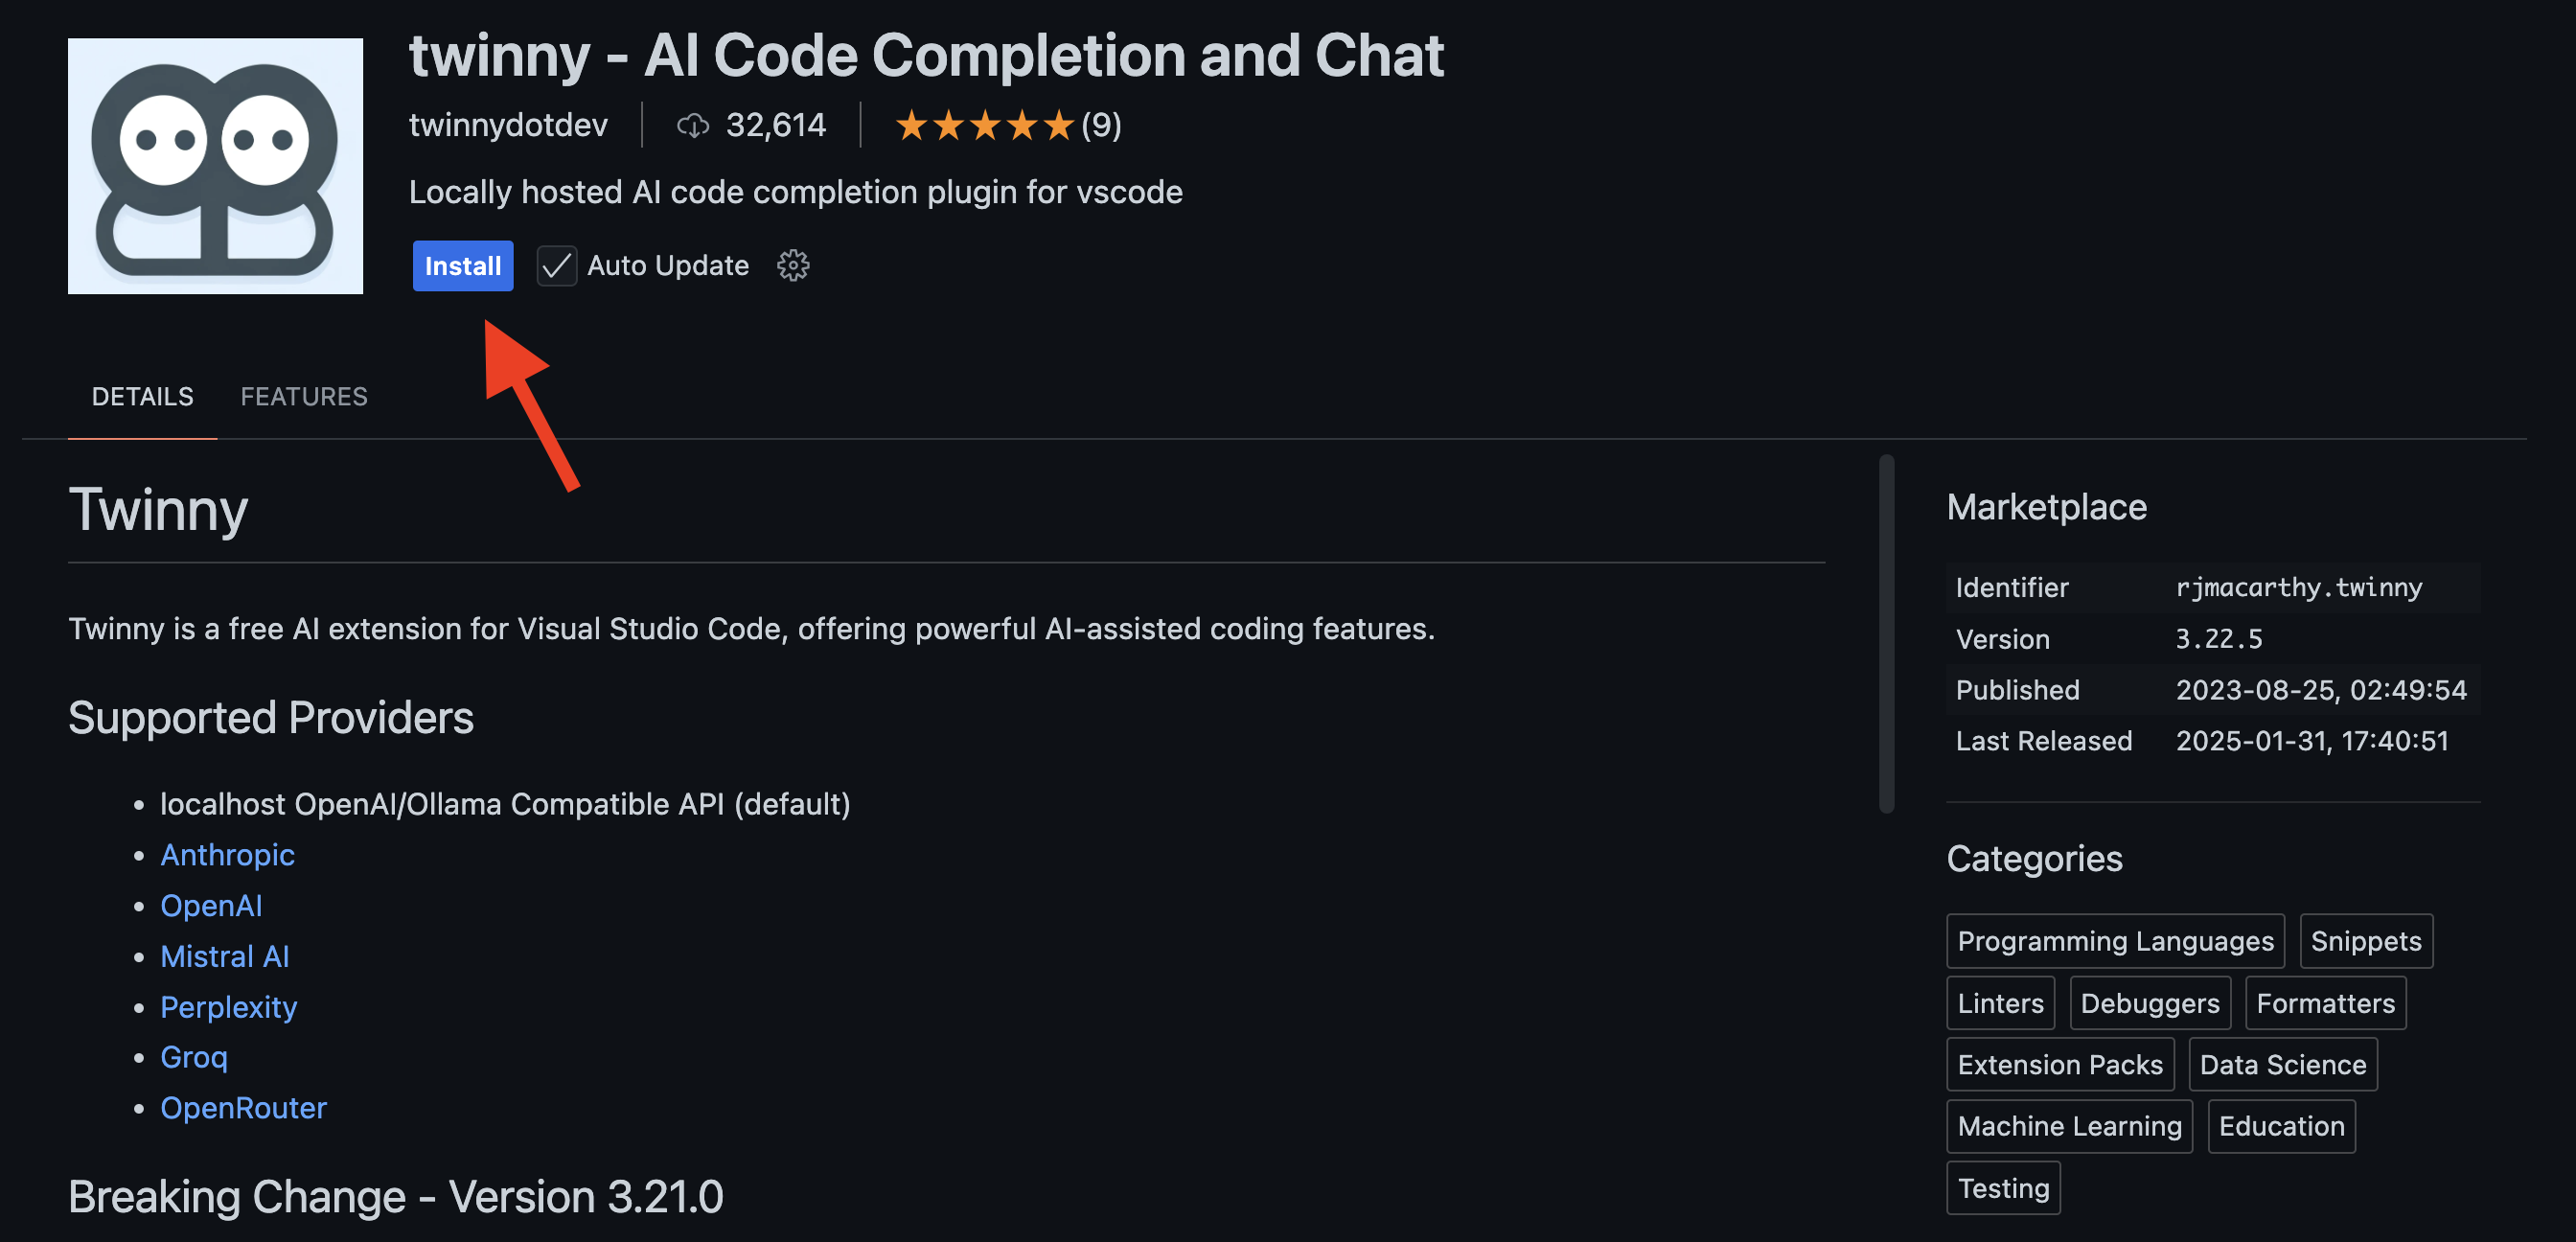
Once installed, open the twinny tab, and click the connections icon.
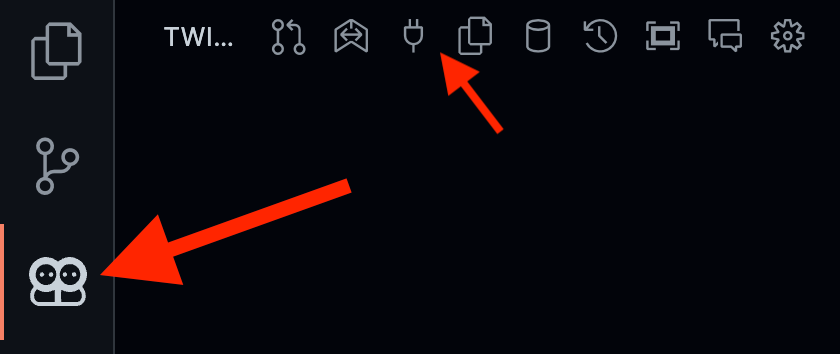
Then, delete the preexisting configurations and edit the OpenAI Compatible connection.
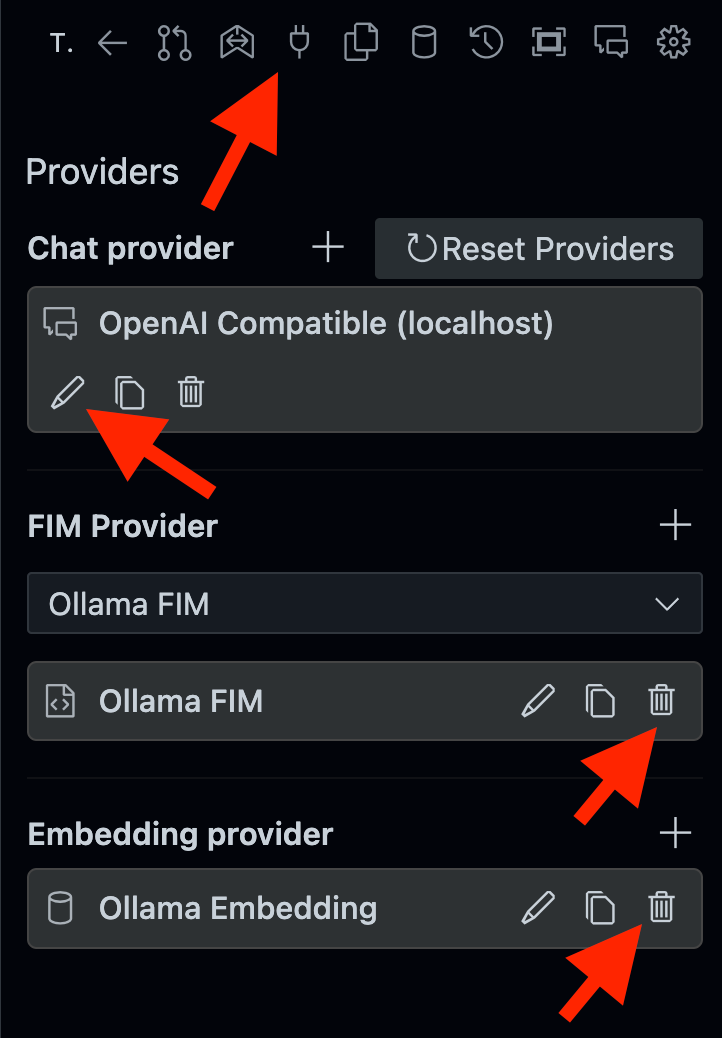
Then update your settings to look like the following:
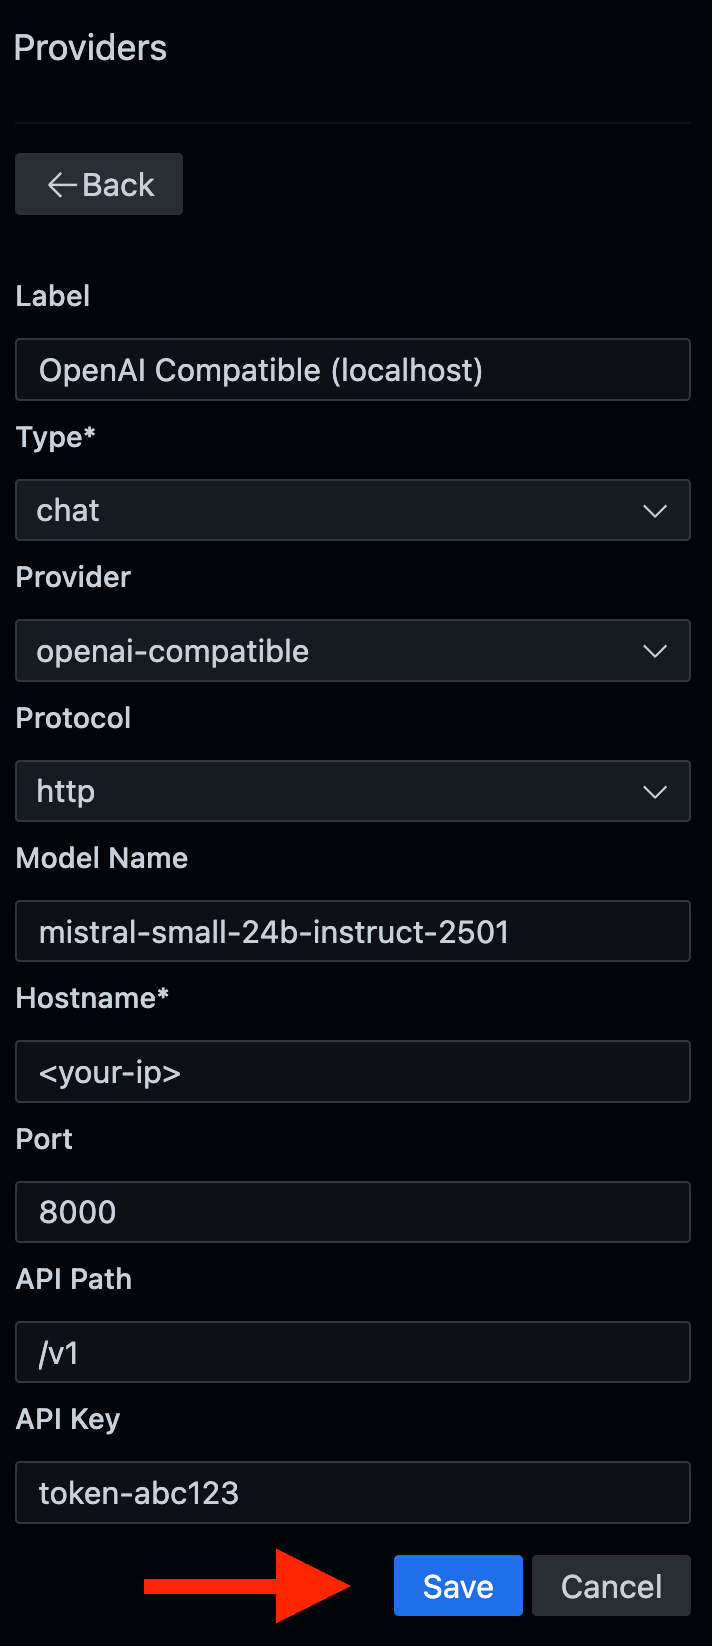
Once you've saved your connection, open the Chat Window.
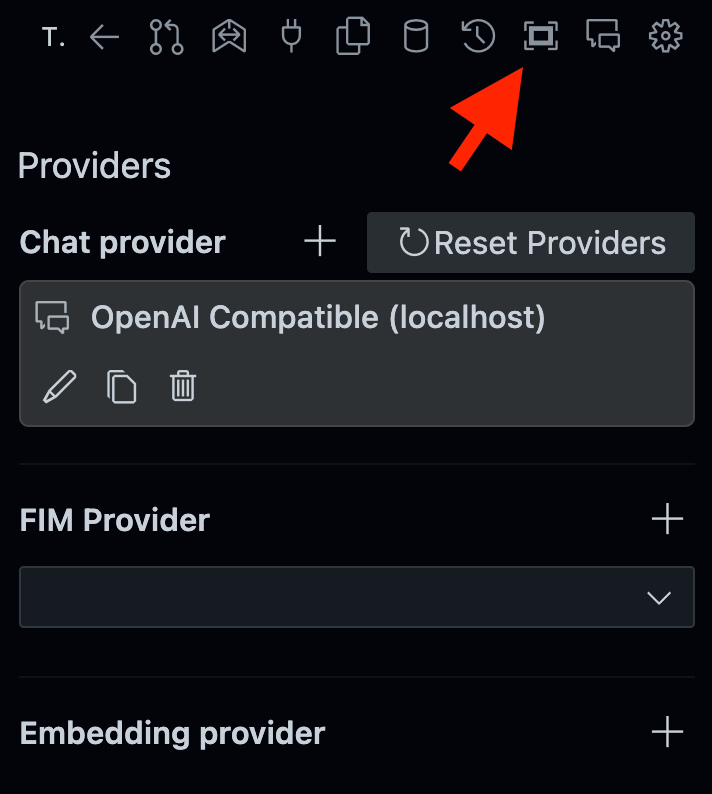
Then, set the model and send a message
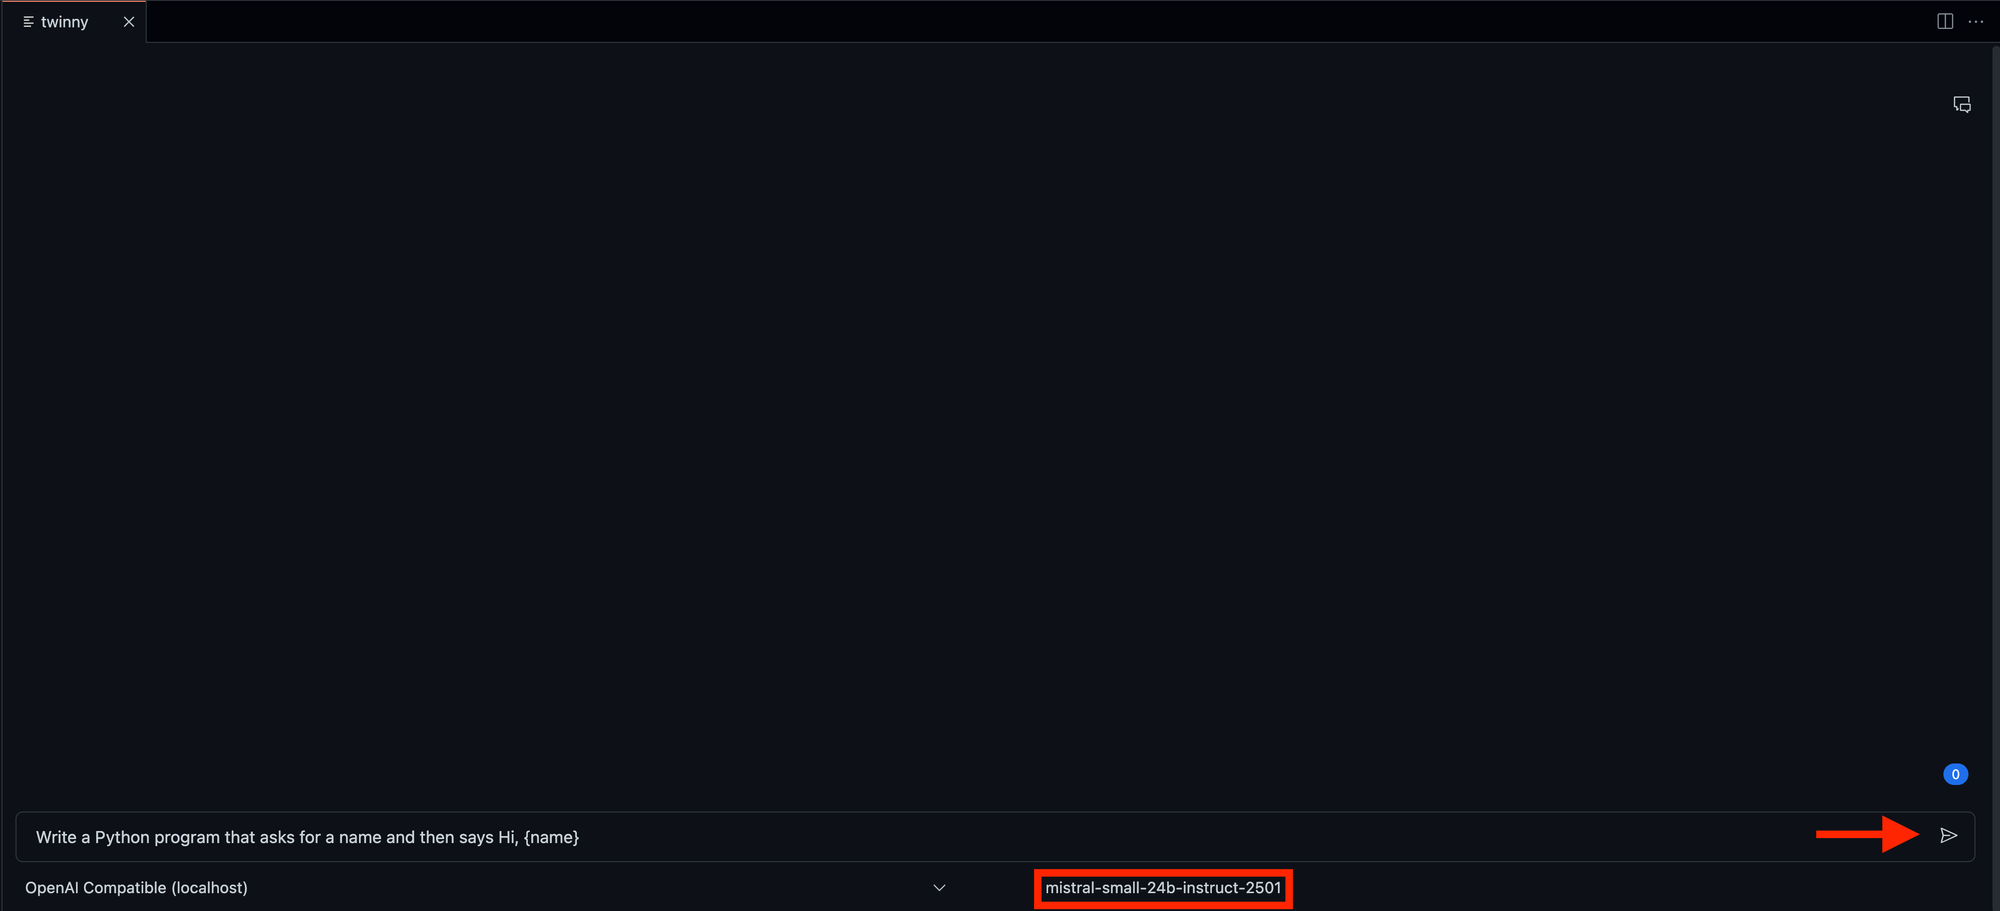
Thats it! You now have self-hosted your own GitHub Copilot with vLLM!

Conclusion
With vLLM, you can efficiently host high-performance language models, scale beyond Ollama’s, HuggingFace Transformers, and HuggingFace Text Generation Inference limitations, and maintain compatibility with OpenAI’s SDK. Whether you’re generating datasets, enhancing adding autocomplete to Visual Studio Code, or developing AI applications, vLLM provides an adaptable and powerful engine for self-hosted AI solutions.
If you liked this article, you won't want to miss my guide on Ollama. Ollama offers a more straightforward approach for self-hosting models, eliminating the complexity associated with HuggingFace and the hardware demands of vLLM. Personally, I choose Ollama despite having the capability to run vLLM, as it allows for swift experimentation with models without needing dedicated AI hardware. Just click here to read it now, and I’ll see you there shortly. Cheers!
